Camp Trailer Remodel
Over spring break we got a new to us 1982 camp trailer. We drove down to Cedar City to pick it up which is about a 4 hour drive for us. We knew that it looked to be everything we wanted in a trailer. It has 4 bunk beds in the back the dinette makes into a bed and there is a bunk above the dinette. So 6 separate beds for 6 people... Perfect for our family. We picked it up at 10:00 pm looked it over bought it and spent the night in the Walmart parking lot. The next day we camped in Bryce Canyon and got a chance to see if everything worked. Not everything did. The refrigerator didn't work, the propane bottles weren't working right, and the exterior lights didn't work. But no leaks and it definitely has great bones and a wonderful layout.
When we got it home the first thing I did was get rid of the mini blinds and the first thing my husband did was wax the outside, it almost looks new! I then drew up a design for the back bunk beds. I wanted to make each bed match each person's personality, and make it into their own space. I am trying to design everything to be easy to keep clean and look neat and to make the most of every inch of the trailer. The beds will be set up at all times, we don't usually use the dinette when we camp so this will save time when it is bedtime. I really wanted to make quilts for each bed but I knew that they would not be made in the morning...my kids are not good at making their beds especially when we are camping and I am OCD when it comes to neatly made beds. I thought we would all have a fitted sheet for our beds and a nice fleece blanket and then a sleeping bag on top with a cute pillowcase and some fun accent pillows. Sleeping bags are very easy to smooth out and make neat.
I started with making some curtains for my bedroom area. I picked a really cute floral print and found some cute accent pillows.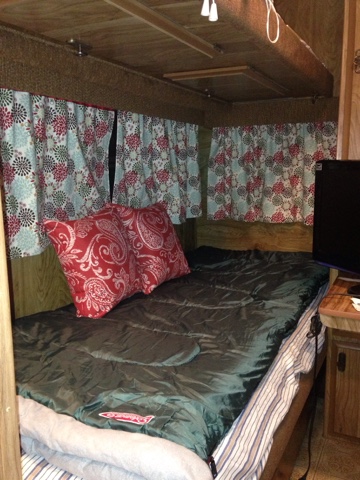
I chose a blue and white striped fabric for my husbands curtains and I found some cute American flag pillows to go with it.

Next I worked on Austin (11) and Hannah’s (8) bedroom areas. They are both on the top bunks above mine and my husband’s bunks. There is one tiny window in each of their sleeping areas but it is opaque and not big enough to worry about a curtain so to make it fun for them I made some bunting to hang up and found some accent pillows to go with their areas.  I also bought a chalk board that is magnetic for each of them to hang up in their areas. I just need to make pillow cases and make something for them to put their reading books and treasures in. I also hung up some pictures that they liked. I think it looks great.
Next was the kitchen, ugly fake papered paneling and cupboards lots of brown wood, pretty boring. Because of the paper I didn’t want to paint the cupboards or walls so I instead glued some fun red fabric on them using spray glue. I cleaned out and washed the cupboards and put some fun fabric in them and put down some shelf liner. I cleaned the stove and range hood really well and my husband ordered some tin tiles online to use as a backsplash for the stove.  We tried looking at Lowes and Home Depot for the tin tiles but they only had plastic look alike tiles and I didn’t want them to melt while I was cooking on the stove. Just so you know construction adhesive does NOT work on metal, so I had to use some sheet metal screws to secure it to the wall.
 I painted the fridge with some chalkboard spray paint, and secured a cute picture to the top.
 I think that the kitchen turned out awesome, it is truly my favorite part of the trailer!
The bathroom is still to come…
The dinette bunk needs to be done too…
Onward and forward…

Super cute!!!! Love it!
ReplyDelete